1.7.10
Start Guide
You have to install & setting 3 Required!
This is the information that process of install & setting you need to use cocricot in 1.7.10. cocricot required some mod & setting. It’s not difficult, so please read & try!
Deployment
Install Forge
Verious mods need to launching with Forge. OptiFine and cocricotMOD need Forge.
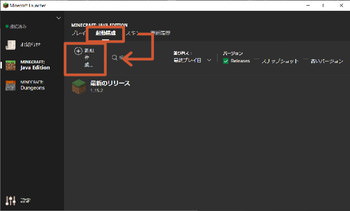
 If you haven’t launch a version that you want to use cocricot, you have to launch the version. Launch lancher of Minecraft, and chose “Installations” on the menubar. Then, Click “+ New…” button.
- Chose version that you want to use cocricot on VERSION bar, and click “Create” button.
- If you hover on the installations, “Play” button will appear. So, click the button and launch Minecraft.
- Go to the website of Forge and chose the version that you want to play from sidebar. Then, download “Windows Installer” or “Installer”.
- Double-click the installer. Check to the check box, “Install client” and click “OK” button.
- If the window display “Successfully…”, you success in installation Forge. Click “OK” button.
- Close Minecraft that launch elier and launch the lancher. Confirm the installation to chose Forge, and play Minecraft.
- If the window display “Forge” in lower-left, you success in installation Forge. Quit game.
 If you haven’t launch a version that you want to use cocricot, you have to launch the version. Launch lancher of Minecraft, and chose “Installations” on the menubar. Then, Click “+ New…” button.
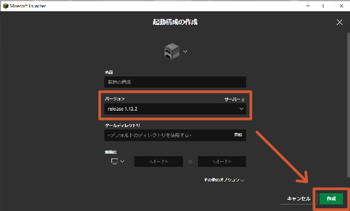 Chose version that you want to use cocricot on VERSION bar, and click “Create” button.
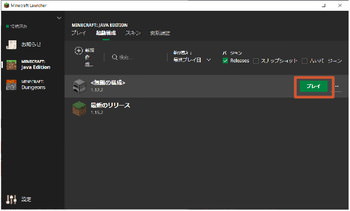 If you hover on the installations, “Play” button will appear. So, click the button and launch Minecraft.
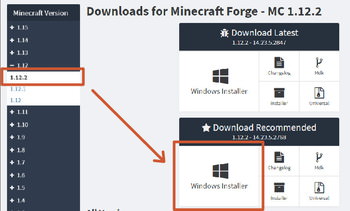 Go to the
 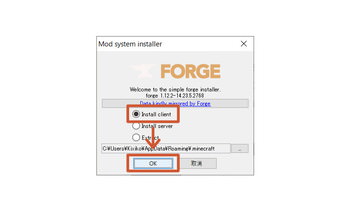 Double-click the installer. Check to the check box, “Install client” and click “OK” button.
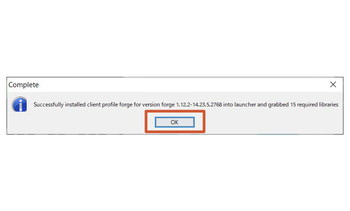 If the window display “Successfully…”, you success in installation Forge. Click “OK” button.
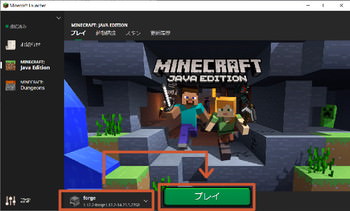 Close Minecraft that launch elier and launch the lancher. Confirm the installation to chose Forge, and play Minecraft.
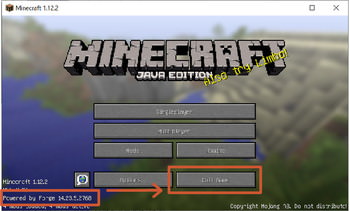 If the window display “Forge” in lower-left, you success in installation Forge. Quit game.
Install OptiFine
OptiFine is two birds with one stone, because OptiFine enable weight reduction and use Connected Textures Mod(CTM). CTM is essential function for cocricot.
- After installed Forge, download latest version that you want to play OptiFine from website of OptiFine.
- “mods” folder is generated in “.minecraft” folder and create new folder named the version you want to use in “mods” folder. (ex. “1.12.2”) Then, put OptiFine in the folder.
- If the window display “OptiFine” in lower-left, well done!
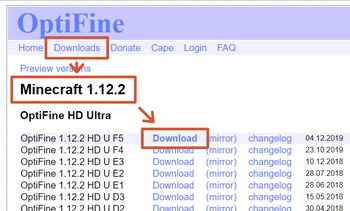 After installed Forge, download latest version that you want to play OptiFine from
 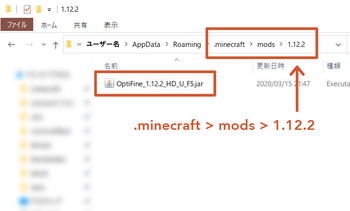 “mods” folder is generated in “.minecraft” folder and create new folder named the version you want to use in “mods” folder. (ex. “1.12.2”) Then, put OptiFine in the folder.
 If the window display “OptiFine” in lower-left, well done!
Apply resourcepack
Finished install Forge and OptiFine, apply cocricot!
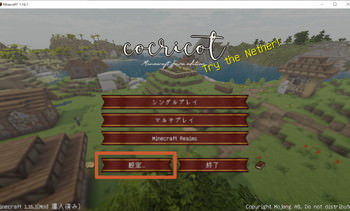
- Open “Options…”, and click “Resource Packs…”.
- Click “Open Resource Pack Folder” button.
- Put a zip file of cocricot on the folder.
- Click “Done” button, and click “Resource Packs…” button again.
- You can see cocricot in section “Available Resource Packs”, so click the icon. Confirm to move cocricot to right section “Selected Resource Packs”, click “Done” button.
- If the button change to a ribon, well done! Next, you have to set up OptiFine. Please go to next article.
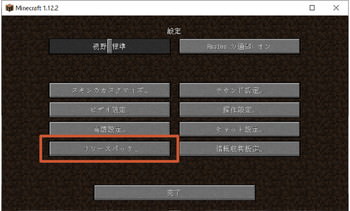 Open “Options…”, and click “Resource Packs…”.
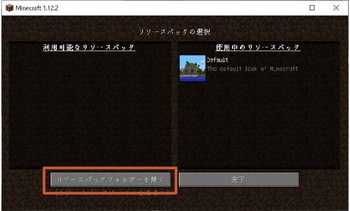 Click “Open Resource Pack Folder” button.
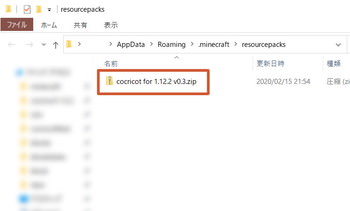 Put a zip file of cocricot on the folder.
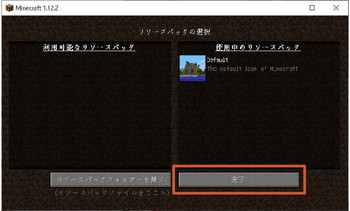 Click “Done” button, and click “Resource Packs…” button again.
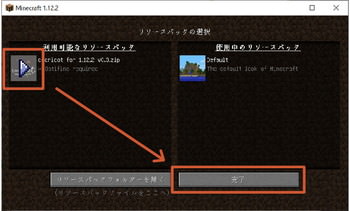 You can see cocricot in section “Available Resource Packs”, so click the icon. Confirm to move cocricot to right section “Selected Resource Packs”, click “Done” button.
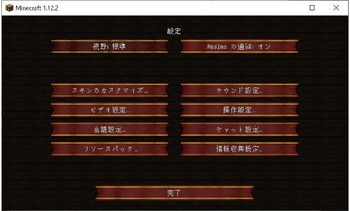 If the button change to a ribon, well done! Next, you have to set up OptiFine. Please go to next article.
Setting
Enable CTM
There is some incorrect textures with default setting of OptiFine. So, change setting.
- After installed OptiFine, click “Options…” button on gamemenu.
- Click “Video Settings…” button.
- Click “Quality…” button.
- “Connected Textures” set to “Fancy”.
 After installed OptiFine, click “Options…” button on gamemenu.
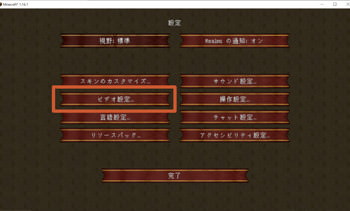 Click “Video Settings…” button.
 Click “Quality…” button.
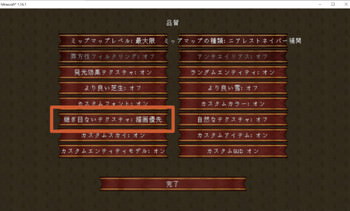 “Connected Textures” set to “Fancy”.
Remove square clouds
Default square clouds is unsuitable with cocricot, so remove that!
- The square clouds are unsuitable with cocricot.
- After installed OptiFine, open gamemenu, click “Options…” button, “Video Settings…”, “Details…”.
- Turn off first button “Clouds”.
- If there are no square clouds, well done!
 The square clouds are unsuitable with cocricot.
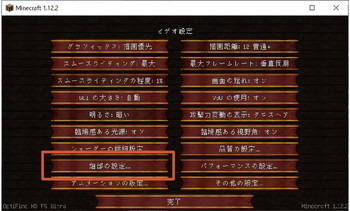 After installed OptiFine, open gamemenu, click “Options…” button, “Video Settings…”, “Details…”.
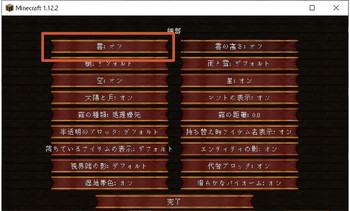 Turn off first button “Clouds”.
 If there are no square clouds, well done!
Tips and hints
How to install LotMetaBlockMod in single?
Single mode only. This mod makes easy to change meta number of a lot of blocks in cocricot for 1.7.10.
- After installed Forge, download latest version mod from website of LotMetaBlockMod.
- Put the mod’s file under .minecraft/mods/1.7.10 just like OptiFine.
- Launch Minecraft version 1.7.10 that is installed Forge, and click “Mods” button.
- Scroll bar, and confirm that there is “LotMetaBlockMod”. Then, quiet game.
- Open the file “LotMetaBlockMod.cfg” in .minecraft/config folder by Notepad.
- This file can change ON/OFF of a function. If you want to use a function, rewrite the function’s “false” to “true” and save file. We reccomend to use all functions once in the first time.
- Open a file “LotMetaBlockMod-Server.cfg” in same folder by Notepad.
- Add blockID that you want to use metadata to row of numbers. You can change meta number with LotMetaBLockMod only blocks in row of numbers.
- Scroll the file, rewrite “B:enable=false” to “B:enable=true” witch true function in “LotMetaBlockMod.cfg”, and save file. Restart minecraft, you must use some functions of LotMetaBlockMod!
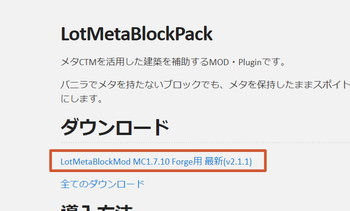 After installed Forge, download latest version mod from
 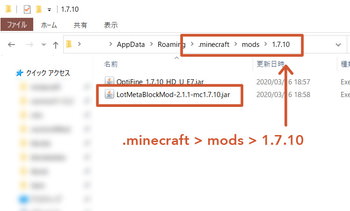 Put the mod’s file under .minecraft/mods/1.7.10 just like OptiFine.
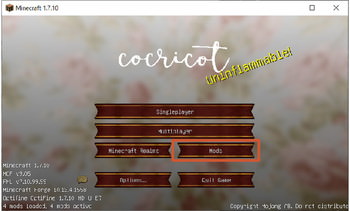 Launch Minecraft version 1.7.10 that is installed Forge, and click “Mods” button.
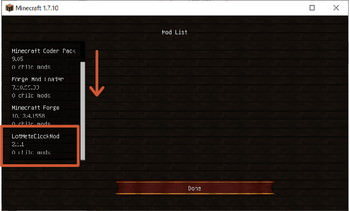 Scroll bar, and confirm that there is “LotMetaBlockMod”. Then, quiet game.
 Open the file “LotMetaBlockMod.cfg” in .minecraft/config folder by Notepad.
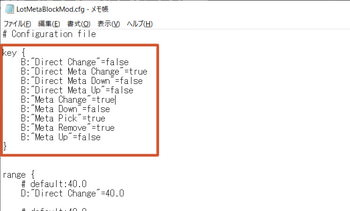 This file can change ON/OFF of a function. If you want to use a function, rewrite the function’s “false” to “true” and save file. We reccomend to use all functions once in the first time.
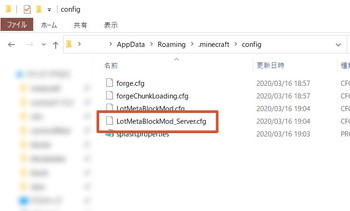 Open a file “LotMetaBlockMod-Server.cfg” in same folder by Notepad.
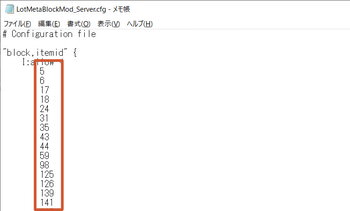 Add blockID that you want to use metadata to row of numbers. You can change meta number with LotMetaBLockMod only blocks in row of numbers.
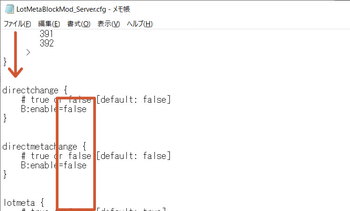 Scroll the file, rewrite “B:enable=false” to “B:enable=true” witch true function in “LotMetaBlockMod.cfg”, and save file. Restart minecraft, you must use some functions of LotMetaBlockMod!
How to detect a BlockID?
How do I find out the block ID?
- Press F3 key and H key simultaneously. Open inventory by E key, and hover block, you can see the blockID side on the block name.
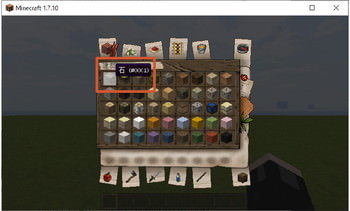 Press F3 key and H key simultaneously. Open inventory by E key, and hover block, you can see the blockID side on the block name.
How to change biomes?
Single mode only by WorldEdit.
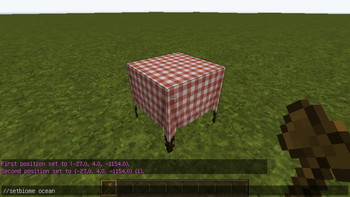
 Set a selection area that you want to change biome, type “//setbiome ocean”. “ocean” is biome name. You have to type as a small letter.
- After you confirm to run that command, reenter the world. Then, you can see that change biome!
 Set a selection area that you want to change biome, type “//setbiome ocean”. “ocean” is biome name. You have to type as a small letter.
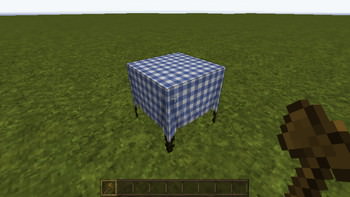 After you confirm to run that command, reenter the world. Then, you can see that change biome!
How to prevent to increase mushrooms?
There are a lot of textures in a mushroom of cocricot for 1.7.10, but the mushroom increase around area. This is a method to prevent increasing a mushroom.
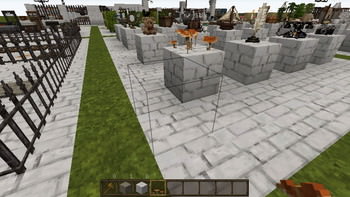
- This is a method that fill empty space on the floor with air block(blockID 36). Now, we will introduce a process with WorldEdit.
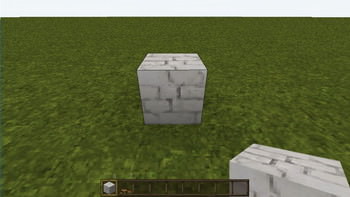
- Put air block first before put a mushroom, because put some blocks side on mushroom in bright area, the mushroom are removed. A white block is the place to put mushroom in this image. The mushroom is increase 2 block area in circuit under 12 brightness, so fill 2 block area around the mushroom with some blocks.
- In this situation, stone block (blockID 1) replace to air block (blockID 36), so serect the area with WorldEdit and type command “//replace 1 36”.
- After that, the white block replace to a mushroom. This method is effective for open the world that created in server in single.
 This is a method that fill empty space on the floor with air block(blockID 36). Now, we will introduce a process with WorldEdit.
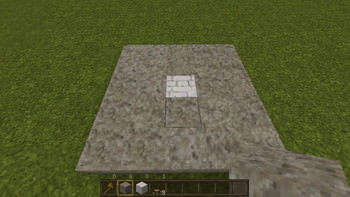 Put air block first before put a mushroom, because put some blocks side on mushroom in bright area, the mushroom are removed. A white block is the place to put mushroom in this image. The mushroom is increase 2 block area in circuit under 12 brightness, so fill 2 block area around the mushroom with some blocks.
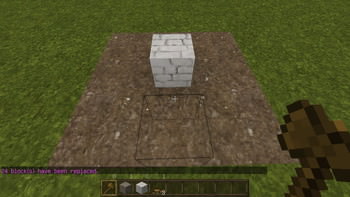 In this situation, stone block (blockID 1) replace to air block (blockID 36), so serect the area with WorldEdit and type command “//replace 1 36”.
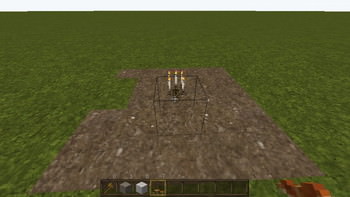 After that, the white block replace to a mushroom. This method is effective for open the world that created in server in single.
How to put a mushroom on bright area?
By LotMetaBlockPack
- After installed LotMetaBlockMod, put a block on the area that you want to put a mushroom. Anyblock is OK.
- Have a mushroom, and focus the block that you want to put the mushroom, then press Z key. Direct change will operate. The block will replace to the mushroom.
 After installed LotMetaBlockMod, put a block on the area that you want to put a mushroom. Anyblock is OK.
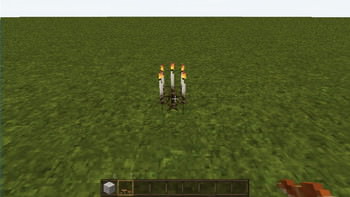 Have a mushroom, and focus the block that you want to put the mushroom, then press Z key. Direct change will operate. The block will replace to the mushroom.